In each of the lessons, you can click on this top logo to go to the index of lessons
Lesson 2: The Grand Staff
When we talk about "playing by ear," we often mean being able to play
music without being able to "read music" at all. Some people may be able
to do this, but for this class, it will help me explain some ideas - and
it will help you understand them - if we learn a little bit about musical
notation.
.
In the days before MP3s, before CDs, before cassette tapes and MIDI... the
way people shared music with each other was to write it down using musical
notation. A person in London would write down a song and send those pages
to someone in Vienna, who could sit down at their piano and hear the song.
Fortunately, these days we DO have ways to share music in recorded form,
and this lesson will include lots of recordings to help you understand how
printed music connects to things we've already learned on the keyboard.
.
Once again - there are a LOT of audio clips, but each one is short and
explains ONE idea.
.
RM121
.
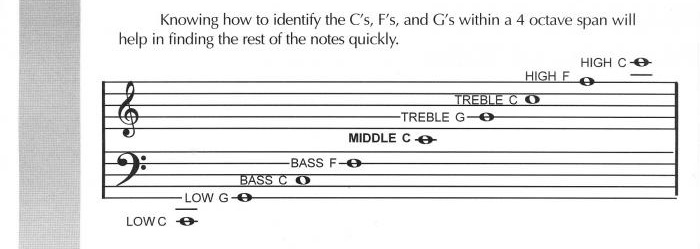
Play this clip to begin learning about the grand staff. I'll explain
the G clef and the F clef and "ledger lines." We'll also learn our first
two landmark notes on the musical staff (Bass F and Treble G).
.
.
.
RM123
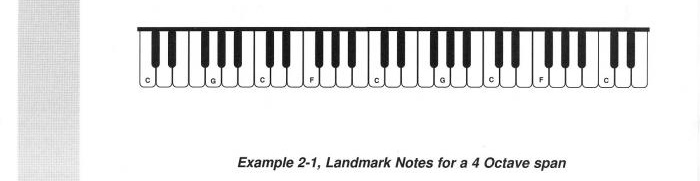
Play this clip to learn how the Grand Staff works as a picture of the
keyboard. Each line and space represents one white key on the keyboard.
On the drawing of the keyboard below, I've marked the same notes that I
show on the staff above.
.
.
.
RM124
.
Click to learn about the two-part names of notes - "Low C," "Bass C,"
"Middle C," "Treble C," and "High C" each refer to a different key
on the keyboard, even though they are all the "C" note. Here is our
grand staff again:
.
.
.
.
RM125
.
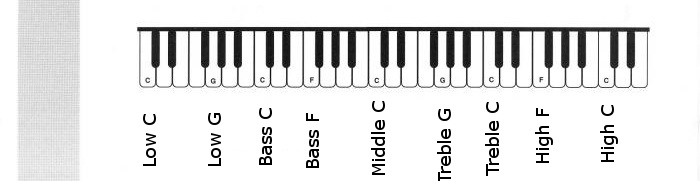
Click to follow along as I move up the keyboard from "Low C" to each
of the Landmark notes on the keyboard. Here is our drawing of the
keyboard with the note names written to help you out.
.
.
.
RM126
.
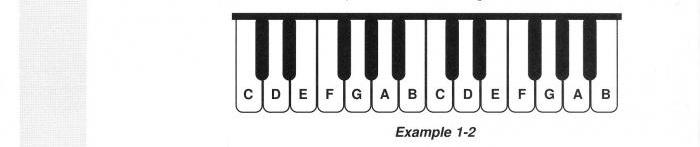
Click here to learn about the meaning of "octaves" - sets of 8 white
keys. Here is a picture from one of our earlier lessons that you
can use to follow along as I explain octaves.
.
.
.
RM127
.
Click to hear about an exercise you can do to help you learn the Landmark
notes on the staff and the keyboard. Click on the "Worksheets" icon just
below to bring up a PDF file that you can print out for the exercise. You
will probably want to print a few copies of the worksheet, as repetition
will help you commit the information to memory.
.
Click here to see a PDF copy of the worksheet you will use for this
exercise. The worksheet will open in a new tab or window in your web
browser, so you may need to look around for it...
.
.
RM129
.
Click to work through the process of playing the different Landmark
notes on the keyboard with me. To help you practice, I'll play some
background music while you play the Landmark notes. Here, again, is our
diagram of where the Landmark notes appear on the keyboard:
.
.
.
RM130
.
Here is another exercise; in this one, we play the "G" Landmark notes.
.
.
RM131
.
And here's another exercise, playing the "F" Landmark notes.
.
.
RM132
.
And now we'll put it all together, playing ALL the Landmark notes
from the bottom up.
.
.
Hooray, You Made It Through Lesson 2 !!!
Well... we covered a LOT of material in this lesson, didn't we? I hope
everything made sense - but if you still have questions, click the "Ask
Rhonda" button to send me an email and I'll try to answer your questions
as soon as I can!

 Lesson 2: The Grand Staff